Showing posts with label shabby chic. Show all posts

Monday, March 11, 2013

Petite Projects II


Those of you who follow my Facebook page may have seen a cryptic yet glam photo of some new materials I'll be working with in the near future, taking this digital petit salon in yet another new and delightful 18th-century direction.

In the meanwhile, I did some more little projects over the past few weeks to glam up my walls. The first was to find another home for the big ivy plant I brought home awhile ago and have been dividing up and repotting.

I didn’t have any more pots, and I didn’t have a plant holder for the wall. What I did have was a peanut butter jar, an old picture frame, and the enthusiasm of an 18th-century mod girl.

Basically I layered scrapbook paper against alternately-painted frames to make some nice contrast. Then I took picture wire and wrapped it around the peanut butter jar, then twisted the ends together into a long pointy rope. Next I poked a hole through the scrapbook paper/picture background, stuck the wire rope through it, then unwound it enough to flatten both ends against the back of the frame in opposite directions. I dabbed a thin layer of clear glue around the wire holding up the peanut butter jar even though it felt pretty sturdy, and I taped down the flattened wire on the back of the frame to hold it in place.


Pretty crafty! If you recall from my other Petite Projects post, I used the same Rococo-style scrapbook paper for the background. This type of repurposed plant holder probably isn’t something you’d commonly find from the 18th century, but I loved finding another purpose for that scrapbook paper, and it’s just so sweet up on my wall!

This next project was with a Rococo-style swirly resin wall piece that I’ve had my eye on for awhile at Hobby Lobby. I finally sprung for it this week when it was half-off (I and the sales assistant who helped me agreed that paying full price for anything makes one feel sad) and got to work.

This job is pretty simple. You need the basic team on your side:
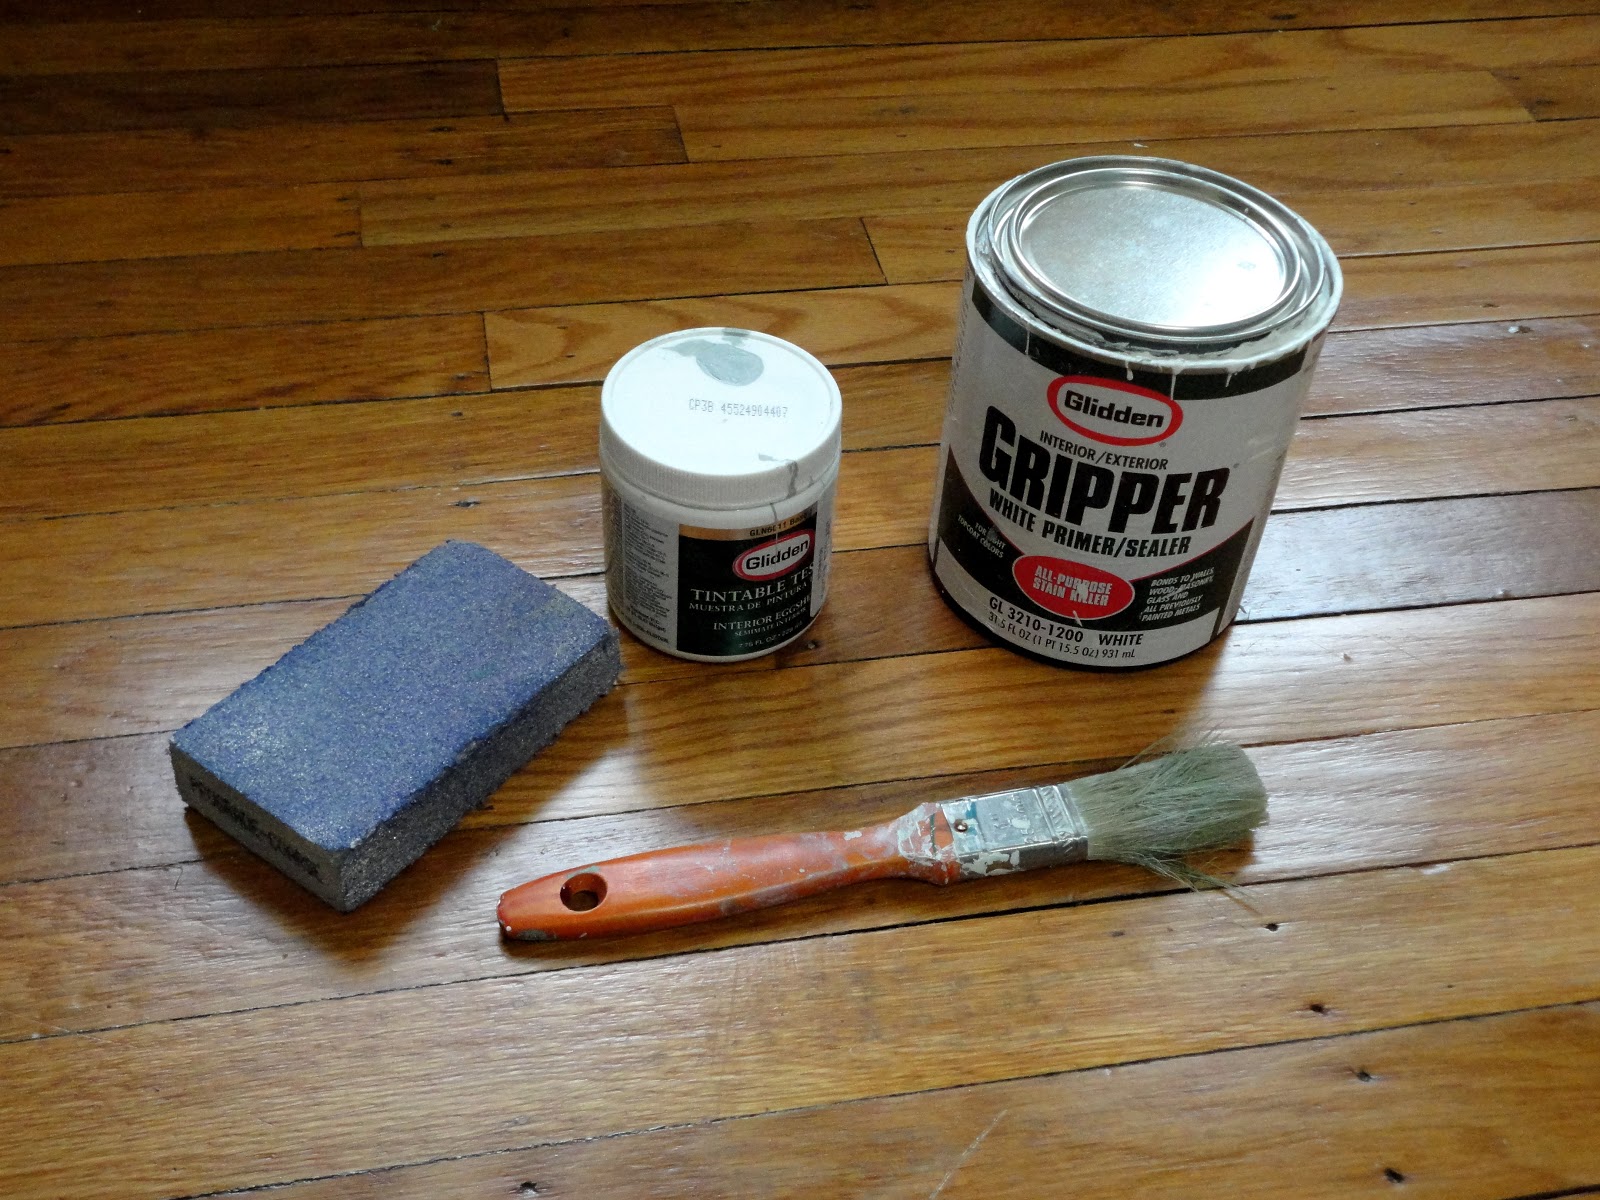
  • primer
  • paint of your choice
  • a 1-inch paintbrush, or smaller, if you are more dedicated than me
  • medium-grade or course-grade sanding sponge 

Prime the piece, allow it time to dry, then paint and allow that to dry. The main challenge to painting such a swirly fanciness is that there are so many freaking crevices to get the paint into. I said I used a 1-inch brush but you could use a smaller brush if you want to paint more carefully—since I knew I would be distressing the piece after painting anyway, I wasn’t quite so concerned if I painted it perfectly.


This is why I love shabby-chic. It’s supposed to look like it’s 250 years old or whatever, so who cares if you fudged that weird corner! It’s supposed to look like George Washington wrote the Constitution on it.


Enjoy and stay tuned for new 18th-century-themed things for spring!

Thursday, March 7, 2013

The Mod Sewing Circle


I didn’t mean to purchase a Progressive-era sewing table. It just…happened.

Okay, here’s what really happened. I’ve been wanting to get started on some sewing projects in the near future, and I realized that I didn’t have a good work surface for such projects. And the thought spending money on some unattractive laminate work table with modular black plastic legs just made me sad.

So I found this…interestingly decorated…old sewing table on Craigslist for $35!

It looked pretty old. Maybe not 18th-century old—but I bet it wished it were. Poor post-industrial revolution sewing table! I will help you. It had pretty moulding on the sides and drawer fronts, albeit in, ahem, rather bold color choices. It had a drawer for the sewing machine to collapse into. Theoretically. I could work with this.

The main renovation to this piece (so far) would be simply in the painting, as I 1) wanted it to match the other furniture in my room and 2) wanted it in colors that I consider more fashionable for the 18th century look.

For this project, I needed the gang with me once more:
  • some primer (I use Glidden’s)
  • paints: lighter color for the body of the table, and a darker color for the drawers and lid (I used the same colors in my dresser project)
  • a medium-grade sanding sponge
  • Howard Feed-N-Wax furniture wax polish
  • new drawer knobs because the old ones were 1) partially missing and 2) extremely blah
  • a screwdriver (sorry, forgot to add this to the pic)

I also had a cup of tea. I drank Irish Breakfast this time, but as I said before, Lady Grey or any tea will do that makes you feel all fancy.

First, remove the drawers and unscrew the old drawer knobs. Sand all the surfaces you’ll be painting so that the primer sticks around, much the same way that the Hair Bump has:
Left: circa 18th century. Right: circa 2007, somewhere on late night television.
Next, prime everything. Note: since this piece has a lid that lifts and lays on top of part of the surface of the table, make sure to leave adequate time for everything to dry before you switch sides to paint on.

Once the primer dries, paint the body of the table in the lighter color (or however you like—try reversing colors if you feel adventurous!) and the body of the drawers. Let the drawers dry to the touch, then paint the drawer fronts in the darker color. Let everything sit for awhile and drink some more tea, perhaps while reading Camilla.

Once everything is painted and dried, get out the medium-grade sanding sponge again (or switch to a fine-grade if you prefer) and scuff the edges and corners to your little heart’s shabby-chic desires. Take a damp cloth and wipe off all the little sandy paint bits from the table, and on the floor.

Screw the new drawer knobs in and replace the drawers. Now get out the Howard furniture wax and buff a healthy helping into all of the wood surfaces, as this thirsty piece is surely a veteran to climate change. Let the wax sit for at least 20 minutes, then wipe it dry with a soft cloth.

Ta da! I loooove how this came out! Check out these gorgeous details:


And finally, here’s a bonus tidbit: while initially taking everything apart, I found this crumbling certificate tucked away in the back of the top left drawer:

This sewing table is from July 25, 1910! That makes it 103 years old this July. Hmm. Maybe I should throw it a party this summer.

*By the way, that 18th century portrait is by Thomas Hickey, and you can see it in full view here. Also, disclaimer, I am NOT a promo rep for Bumpits™.

Monday, February 18, 2013

Some Petite Projects for Presidents Day


Happy Presidents Day!  I just got back from a weekend in D.C. with my mom and sister. My favorite president is John Adams, but mostly because he was just an awesome New Englander, and his wife, Abigail, told him to "remember the ladies" when building this new republic.

Still planning some larger projects, but here are a few little ones I did over the past week:
 I recycled this spaghetti sauce jar into a tea light holder with a layer of salt on the bottom, topped with jumbled stones and glass beads.


I was tired of all of these silver WalMart frames and gave them a little perk up with my paints.

My roommate found this Rococo-style scrapbook paper at Michael's and it looks perfectly darling behind this frame I got years ago from a dollar store.

I un-blahed this WalMart lamp that was originally dark brown and red.

I also decided I needed some more indoor 18th century garden in my life, so I found these sweet, swirly wall planters on Amazon and painted and distressed them before adding painted terra cotta pots planted with ivy:


These came out so sweet and pretty-looking I felt like an industrious colonial housewife, living off the land in proud independence. Except I had help from Amazon.com. And Home Depot. Well, okay, so maybe I feel more like an 18th century mod girl but that's just as good! Happy Presidents Day!

Saturday, February 9, 2013

Fripperies and Such

I have a goal these days, of replacing my $2 tarnished jewelry collection with timeless, quality pieces that don't turn your skin green.

So this project that my roommate found for me on Pinterest was the perfect motivation to make something that would encourage me to showcase some nicer fripperies.  Essentially, this Pinterester's idea is to take picture frames, coat hangers, or even tree branches, and turn them into unique and elegant jewelry holders.

What could be better for the modern girl yearning for more 18th century-style in her life than this darling antiquated frame-turned-frippery display?  Yes, please!

So, to do this project, you need:
  • an open frame (aka without glass), in any shape you like
  • paint, if you want to paint your frame
  • several lengths of lace
  • a glue gun, or quality glue that can withstand some pressure (since jewelry will be hanging off it)

I had the lady at the fabric counter of Hobby Lobby help me with lace.  I picked out the frame I wanted and then we found some sturdy bolts of lace that looked like they could withstand another Revolution, and measured them against the frame.  I think one was made of embroidery floss, and the other had reinforced ribbon running through it.

I'd already bought my paint at Home Depot, and I had a glue gun at home, so I was ready to craft!

I picked a sweet, swirly frame that I found at Hobby Lobby, which reminded me of something you'd see hanging out in Marie Antoinette's bedroom, pre-decapitation times.


I painted the frame in Sea Glass Green, which is kind of minty-colored but still soft and bright.  Note: apparently it's pretty easy for whatever you're painting to stick whatever surface you're painting on.  So unless you enjoy having a pretty close relationship with your flat-head screwdriver and your sanding block, I recommend finding something, like pushpins or something, to elevate the frame off of the scrap paper.

After prizing the frame from the sheets of my college alumni magazine, I used my trusty pink glue gun to glue down the strips of lace I had measured earlier. The surface of the glue dries pretty quickly but you'll want to still let it sit for several hours so it's totally solidified.

And that's it! Super-easy 18th century frippery glam. Just hook or string your baubles into or around the lace and you have an instant jewelry-holder and a pretty wall-piece.


By the way, the ornate style of the frame is often called 'Rococo' and was most popular through the end of the 18th century, though it dates back much earlier.  And now it's popular again as an element of Shabby-Chic style.  Like Sybil Crawley's mod harem pants in Downton Abbey, 18th glam will always have a place in the world.

Monday, February 4, 2013

Mod yourself out, eighteenth century-style

It's shabby chic.

It's the eighteenth century.

It's The Eighteenth Century Guide To Modern Living!  Over two hundred years later, the inventions, the ideas and the style of the Enlightenment are still the top guide for the modern girl.

Jane Austen would take this blog and live in it in a penthouse apartment in Manhattan. Fanny Burney would curl up with this blog on a restored, distressed wooden bench swing on the back porch of a Georgian farmhouse. Sam Richardson would patronizingly laud our female attempt at accomplishment but booo we don't want him! Only nice boys allowed here!

So. Here I am, finally converting my old blog and longstanding college thesis of the same title, into something new, fresh, and totally me for 2013. I don't know why I didn't see this fab connection between shabby chic, my favorite style, and the eighteenth century, before, but sometimes the love we have been looking for has been right in front of us, all along.

If you like Walmart piggy banks being given a new sense of purpose in a troubling world, or empathize with the typical fate of Ikea furniture, then this is the blog for you! I'm so excited to share with you my Pinterest obsessions, my own random ideas for decor, design, delectable yummies, and my adventure in making the eighteenth century a girl's modern guide to life.