Omg! Look at what I have.
This weekend I received a bountiful present from my roommate's stepmom: her cross stitch collection!! She decided she couldn't use it anymore, and because of my crafting passion I got to become the proud recipient.
This variety fun-pack includes multi-sized wooden embroidery hoops, tons of colorful embroidery floss on handy key rings, and retro instructional booklets that I am praying will include at least one soft-focus filter photo of someone in a turtleneck.
You may recall that I gave embroidery a stab (ha! see what I did there?) a little while back and made this cute flower pic.
It was obviously nowhere near as gorgeous or intricate an undertaking as the many beautiful examples of 18th century embroidery you can find elsewhere, but it was fun and pretty and easy to do, and let's be real, that's what the 18th century mod girl is all about.
This year, cross stitch Santa ornaments for everyone!
Showing posts with label mixing style eras. Show all posts
Sunday, December 14, 2014
Sunday, June 22, 2014
Bitchin' Stitchin'
PREAMBLE: So obviously I've been MIA for awhile. If you spent the past year making fancy cockades per my last post to fill the time, waiting for something new from me, then you should consider investing in a wider social circle. Also, I'm so touched that you actually read the post about making cockades, because even I had some misgivings about the whole value of that one. But hey, you can't be afraid to fail.
So what's next? Maybe it's the whole bohemian/Coachella/faux hippie trend thing happening right now. Maybe it's a need to take a bit of a break from the kind of crafting that requires scrubbing excess globs of paint primer and hot-glue-gun glue from the coffee table. Maybe it's that I've run out of Ikea furniture to shabby-chic and my roommate won't let me touch hers.*
The point of this preamble is that there's a whole aspect of 18th century culture that I haven't even remotely delved into yet: embroidery. It's intricate, it's gorgeous, it's everywhere in fashion now, and it's totally 18th century. Embroidery, of course, has been around for centuries, but in Western Europe, it reached impressive heights in the 18th century, with household linens and clothing getting particular attention.
Embroidered purse from the Colonial Williamsburg online archive collection.
Available at http://www.history.org/history/museums/clothingexhibit/index.cfm
If you want to know what diva status looks like in terms of 18th century embroidery, check this out. Then come back and do some sewing with me. You'll need:
- embroidery hoop/frame
- embroidery floss (usually silk thread works best)
- evenweave or block weave fabric (here's a good guide) or for the more adventurous, linen
I'd never tried embroidery before, so I found an embroidery kit that conveniently comes with everything but the embroidery hoop. I highly recommend this for a beginner, because the fabric in the kits has a handy picture screen printed onto the fibers so you can just stitch right over it. Ain't no shame in that game.
Basically, your kit will include instructions for how many threads should be used in each type of stitch. Separate your threads, then get to work!
As you can see, I sew about as evenly and accurately as a chick applying lipstick on a plane with turbulence. So what? This was really fun, and pretty easy to do. I'm going to follow the bohemian mantra sewn on this and give it the 18th century mod girl's seal of approval. Bam.
If you took one look at this, however, and are filled with the desire to do justice to it, you can purchase your own on Amazon.
*Which I personally think is a missed opportunity on her part.
Saturday, April 6, 2013
Feelin' Cocky In a Fancy Cockade
Spring is finally, most definitely here! Sorry I’ve been MIA
for awhile, but here’s a little treat for the crafting soul: accessorizing with
cockades!
Cockades from the 18th century are most commonly
linked with men’s tricorne hats and with military dress–for example, cockades
made up of blue, white and red ribbons were a common symbol of the French
Revolution. But women picked up the fashion and began wearing them too,
partially for their own political convictions, but also probably just because
they were a stylish and official badge of sassiness all on their own. Check out
this baroque babe…that style ain’t no lie.
![]() |
| A Portrait of a Young Lady (Yermolai Kamezhenkov, 1790) |
The fun thing with cockades is that they are basically
pretty easy to make, and totally customizable–in short, the perfect project for
the 18th-century mod girl!
Your list of ingredients will vary depending on how you like
to work with fabric, but essentially you will need:
- Ribbons
- Decorative buttons or items to top cockades
- Bobby pins, headbands, or whatever you plan on attaching
- Fabric glue (very useful for stopping ribbon edges from fraying) or Heat 'N Bond
- Craft glue or a glue gun
- Needle and thread
I played with constructing them in a few different ways, and
today I’ll show you the most common style you’ll see. This is what I’ll call a
flat pleat, to distinguish from the other types of cockades I made. The flat
pleat means you just fold the fabric over in a zig-zag pattern, and then use an
iron to flatten down the folds so you get nice, sharp pleats.
After making and ironing these folds, go over them first with
a running stitch and use it to pull them together into a tight circle. Then go
back over them with a back stitch to reinforce the circle. If you’re unfamiliar
with types of stitches, here’s a quick reference from www.sewdresses.com.
Use craft glue to lightly cover any ribbon edges to stop them from fraying, or press and iron ends with Heat 'N Bond.
Once the cockade is finished, you can hide the central seam
with another smaller bow or a button, charm, or anything you fancy. Finally,
glue on to the back whatever you want to make it an accessory. I glued a
crafting bobby pin (it has a little flat metal circle on top which gives it a
greater surface to stick to things) to the back of this one.
If you want to get all fancy with it, here’s a nice tutorial on making cockades the traditional way.
I, however, am a firm believer in winging it, mod 18th-century style, if you’re
not in the market for perfection. I used an iron to get the nice flat pleats,
but I’m not sure I used the same exact method as the tutorial to finish off the
ends. I just tucked the end of the ribbon in under the first fold I made at the
other end of the ribbon, and that hid all of my handiwork. As long as you’re satisfied
with how it looks, I call that success.
Now check out these 'artistic' Instagram pics. Award-winning, really.
So have at it! Grab some cute ribbons, fabric, buttons, and
anything your 18th-century imagination inspires! More designs to follow, but if
this looks fun and easy to you, feel free to post your own pics of personal
creations.
Thursday, March 21, 2013
Roman Holiday
Evening, friends of the mod salon. I’m finally done with my latest project, after a touch of indisposition, which I’m destroying with some Airborne and about 1,000,000 cups of tea, and some fun freelance work.
I was looking around my room for things I could
make more fabulous, and it was then that I took in my crumbly, sad windows for
the first time and realized how empty and forlorn they looked.
Windows can’t be forlorn; they’re like the eyes on which you’ve neglected to use a wrinkle-minimizing under-eye serum! Actually, that sounds creepy. FYI, though, if you’re looking for under-eye serum, I like Clinique’s All About Eyes Serum De-Puffing Eye Massage.
But that’s neither here nor there. The point
is, I’m on cold medicine so I’m not making a whole lot of sense right now, but
my heart is in the right place when it comes to having a desire for my windows
to get a bit of a Roman holiday...say, two and a half centuries back in time. The way Admiral Lord Nelson
needed Lady Emma Hamilton, my windows needed roman shades: bad.
Now I know you read in past posts that I
wanted to get my sewing machine and table together so I could do some projects
with fabric. But then I found this wonderfully detailed tutorial on how
to make roman shades from those cheap plastic adjustable blinds without having
to haul out the machine. I was sold.
Here’s what you need:
- Cheap plastic blinds
- Several yards of fabric (depending on the length and width of your windows)
- Heat N’ Bond or any brand of iron-on adhesive
- Fabric glue + paint brush for easier application
- Glue gun
- Scissors
Since there are so many steps to this
tutorial, I won’t repeat them all here. Essentially,
these take a little time and effort, but they’re pretty easy!
Measure the length and width of your windows
to figure out the dimensions you need, and cut the fabric to those dimensions,
allowing for an additional 2 – 2 ½” on each end for seams. My windows were 58” long and 30” wide so I
made my fabric about 62” long and 35” wide.
With your dimensions, you then figure out how
many plastic slats you need for the number of folds you want. Since my fabric
would more or less be about 60” long, I decided to make 10 folds, each 6”
apart. See, 10 folds x 6” = 60”. The Compleat Housewife would have been so
proud.
I’m not sure
if I seamed my edges the way the tutorial suggests, but I’ve always been taught
to twice-fold fabric to keep edges from fraying, so that’s what I did:
And now for the finale…
Ta da! The
fabric is neutral enough to go with the other colors in my room, but still has
a lovely, 18th-century inspired print that adds a nice pop of color
and design to my windows.
After making
these pretty shades, I realized I couldn’t put them up next to drab, white
metal curtain rods, so I found a pretty rod from Home Depot from the Martha
Stewart Living collection.
My window feels glam now, and every time I walk in my room, I do too. Huzzah for the mod 18th century!
Monday, March 11, 2013
Petite Projects II
In the meanwhile, I did some more little projects over the
past few weeks to glam up my walls. The first was to find another home for the
big ivy plant I brought home awhile ago and have been dividing up and
repotting.
I didn’t have any more pots, and I didn’t have a plant
holder for the wall. What I did have was a peanut butter jar, an old picture
frame, and the enthusiasm of an 18th-century mod girl.
Basically I layered scrapbook paper against alternately-painted frames to make some nice contrast. Then I took picture wire and wrapped
it around the peanut butter jar, then twisted the ends together into a long pointy
rope. Next I poked a hole through the scrapbook paper/picture background, stuck
the wire rope through it, then unwound it enough to flatten both ends against
the back of the frame in opposite directions. I dabbed a thin layer of clear
glue around the wire holding up the peanut butter jar even though it felt pretty
sturdy, and I taped down the flattened wire on the back of the frame to hold it
in place.
Pretty crafty! If you recall from my other Petite Projects post, I used the same Rococo-style scrapbook paper for the
background. This type of repurposed plant holder probably isn’t something you’d
commonly find from the 18th century, but I loved finding another
purpose for that scrapbook paper, and it’s just so sweet up on my wall!
This next project was with a Rococo-style swirly resin wall
piece that I’ve had my eye on for awhile at Hobby Lobby. I finally sprung for
it this week when it was half-off (I and the sales assistant who helped me
agreed that paying full price for anything makes one feel sad) and got to work.
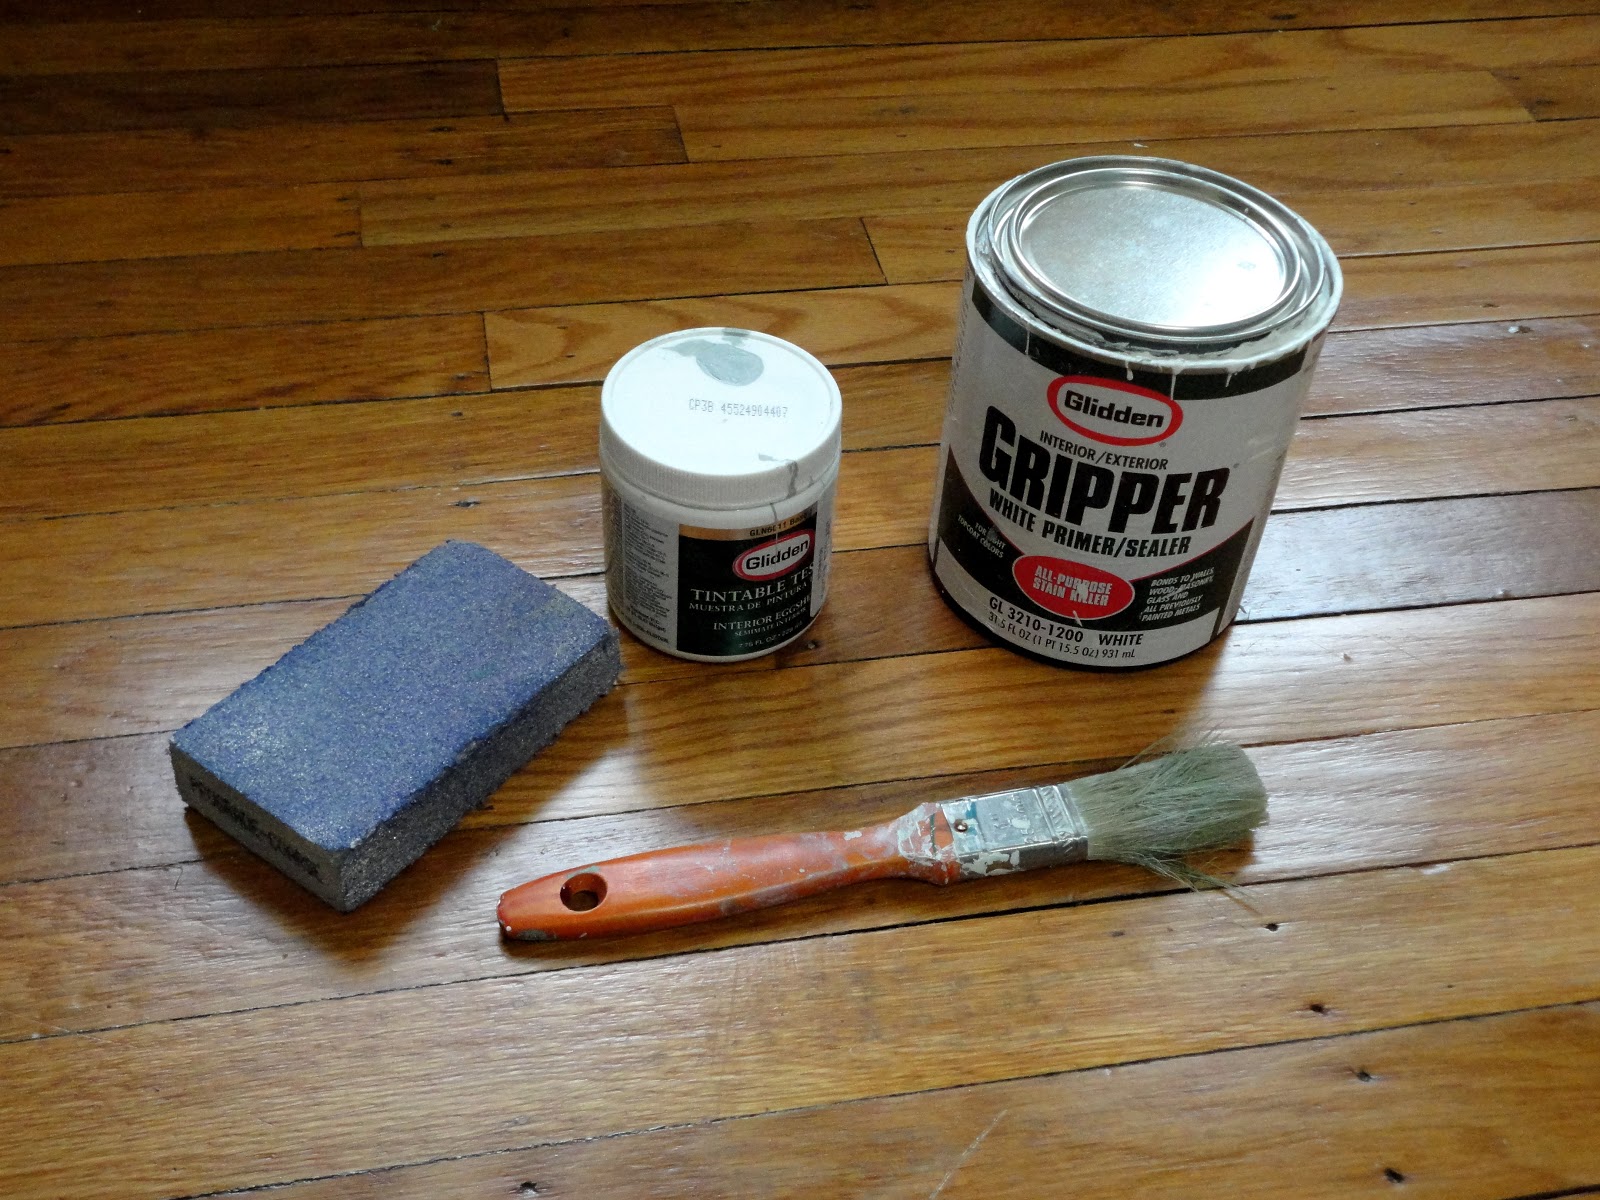
This job is pretty simple. You need the basic team on your
side:
- primer
- paint of your choice
- a 1-inch paintbrush, or smaller, if you are more dedicated than me
- medium-grade or course-grade sanding sponge
Prime the piece, allow it time to dry, then paint and allow
that to dry. The main challenge to painting such a swirly fanciness is that
there are so many freaking crevices to get the paint into. I said I used a
1-inch brush but you could use a smaller brush if you want to paint more
carefully—since I knew I would be distressing the piece after painting anyway, I
wasn’t quite so concerned if I painted it perfectly.
This is why I love shabby-chic. It’s supposed to look like
it’s 250 years old or whatever, so who cares if you fudged that weird corner! It’s
supposed to look like George
Washington wrote the Constitution on it.
Enjoy and stay tuned for new 18th-century-themed
things for spring!
Thursday, March 7, 2013
The Mod Sewing Circle
I didn’t mean to purchase a Progressive-era sewing table. It
just…happened.
Okay, here’s what really happened. I’ve been wanting to get
started on some sewing projects in the near future, and I realized that I didn’t
have a good work surface for such projects. And the thought spending money on
some unattractive laminate work table with modular black plastic legs just made
me sad.
So I found this…interestingly decorated…old sewing table on
Craigslist for $35!
It looked pretty old. Maybe not 18th-century
old—but I bet it wished it were. Poor post-industrial revolution sewing table!
I will help you. It had pretty moulding on the sides and drawer fronts, albeit
in, ahem, rather bold color choices.
It had a drawer for the sewing machine to collapse into. Theoretically. I could
work with this.
The main renovation to this piece (so far) would be simply
in the painting, as I 1) wanted it to match the other furniture in my room and
2) wanted it in colors that I consider more fashionable for the 18th
century look.
For this project, I needed the gang with me once more:
- some primer (I use Glidden’s)
- paints: lighter color for the body of the table, and a darker color for the drawers and lid (I used the same colors in my dresser project)
- a medium-grade sanding sponge
- Howard Feed-N-Wax furniture wax polish
- new drawer knobs because the old ones were 1) partially missing and 2) extremely blah
- a screwdriver (sorry, forgot to add this to the pic)
I also had a cup of tea. I drank Irish Breakfast this time,
but as I said before, Lady Grey or any tea will do that makes you feel all
fancy.
First, remove the drawers and unscrew the old drawer knobs.
Sand all the surfaces you’ll be painting so that the primer sticks around, much
the same way that the Hair Bump has:
![]() |
| Left: circa 18th century. Right: circa 2007, somewhere on late night television. |
Next, prime everything. Note: since this piece has a lid
that lifts and lays on top of part of the surface of the table, make sure to
leave adequate time for everything to dry before you switch sides to paint on.
Once the primer dries, paint the body of the table in the
lighter color (or however you like—try reversing colors if you feel
adventurous!) and the body of the drawers. Let the drawers dry to the touch,
then paint the drawer fronts in the darker color. Let everything sit for awhile
and drink some more tea, perhaps while reading Camilla.
Once everything is painted and dried, get out the
medium-grade sanding sponge again (or switch to a fine-grade if you prefer) and scuff
the edges and corners to your little heart’s shabby-chic desires. Take a damp
cloth and wipe off all the little sandy paint bits from the table, and on the
floor.
Screw the new drawer knobs in and replace the drawers. Now
get out the Howard furniture wax and buff a healthy helping into all of the
wood surfaces, as this thirsty piece is surely a veteran to climate change. Let
the wax sit for at least 20 minutes, then wipe it dry with a soft cloth.
Ta da! I loooove how this came out! Check out these gorgeous
details:
And finally, here’s a bonus tidbit: while initially taking everything
apart, I found this crumbling certificate tucked away in the back of the top
left drawer:
This sewing table is from July 25, 1910! That makes it 103
years old this July. Hmm. Maybe I should throw it a party this summer.
*By the way, that 18th century portrait is by
Thomas Hickey, and you can see it in full view here. Also,
disclaimer, I am NOT a promo rep for Bumpits™.
Subscribe to:
Posts (Atom)